


AI Tutorial- How to Use ChatGPT-4 On Discord
Did you know ChatGPT can be added to your Discord? In this Story.......

Did you know ChatGPT can be added to your Discord? In this Story, you are going to learn how to create a ChatGPT on your own Discord Channel. This bot can do anything you want, just like the ChatGPT UI, like:
"Give me a5 examples for coding proejcts"
"How can I use ChatGPT for Web Scraping?"
"What is the meaning of life?"
If you want to build this bot with me hit subscribe and let me show you how to set up ChatGpt on your Discord using Python, Discord API, Open AI API, and Replit
Pre-built Tool
If you find this tutorial helpful and would like to add more features to your ChatBot, I’ve listed the script Gumroad for 9.95 USD if you want to save yourself some time and try it out for yourself.
Let’s get started!
1. Create your server on Discord
Log in to Discord
Click on add server

Click on “Create my own”

Now select “For me and my friends”

Next, write the name of your server and upload an image

2. Build a bot
1 Go to Discord Application.

2. Click on Applications, then Add New Application

3. Go to General information, Name The App and add App Icon

4. Click Save Changes.
5. From the left pane, Select Bot

6. Next, click Yes, do it on add this bot to the app

3. Generate a URL
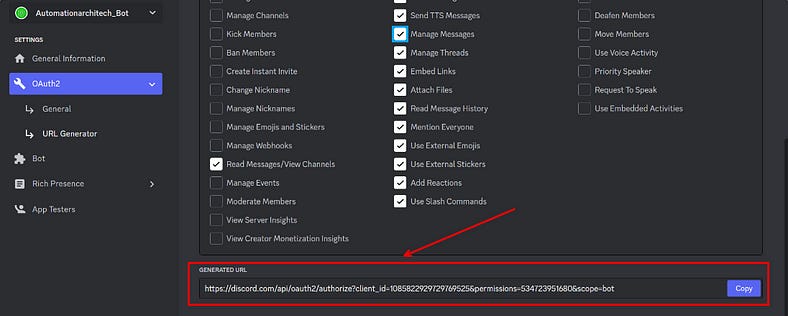
1. Go to OAuth2, click on URL Generator and put a checkmark

2. Scroll down and Select “Read Messages/View Channels”.
3. At the bottom of the page, you will get the URL, select all TEXT PERMISSIONS

4. You will get a URL, copy it and paste it on a notepad
5. Now Go to Bot again, then click Reset Token and copy and paste to your IDE (I use Visual Studio).

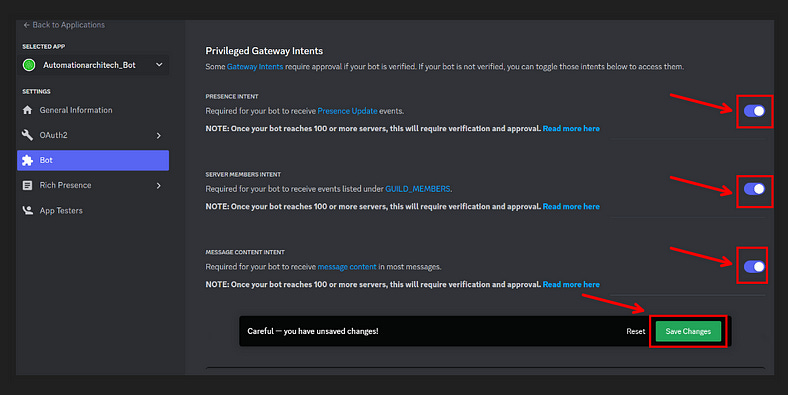
6. Scroll down and enable all “Privileged Gateway Intents”, then Save Changes
4. Authorize
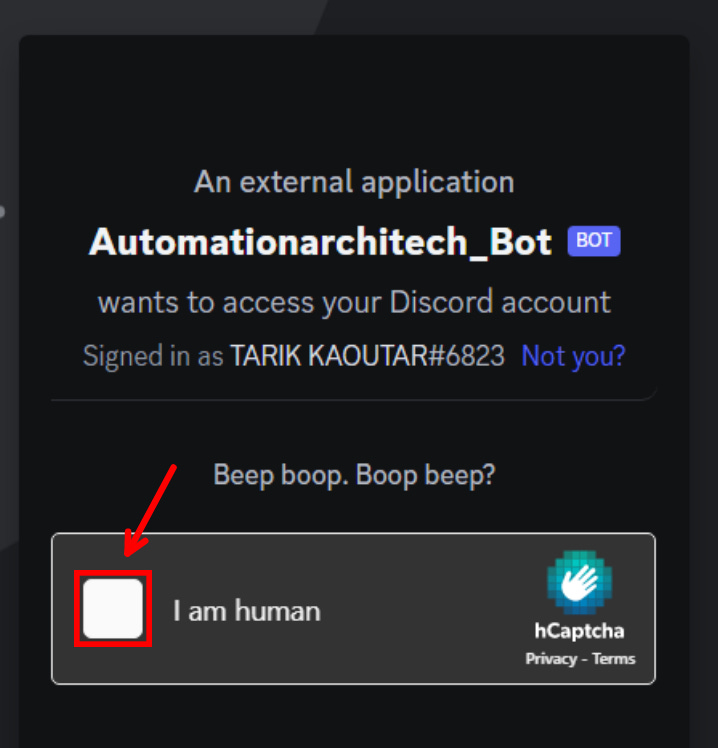
Paste the URL in the browser, then from add to the server, type the name of the server you created. Click Continue.

Verify you are not a robot 🤖 (but yes we do think they are pretty cool)

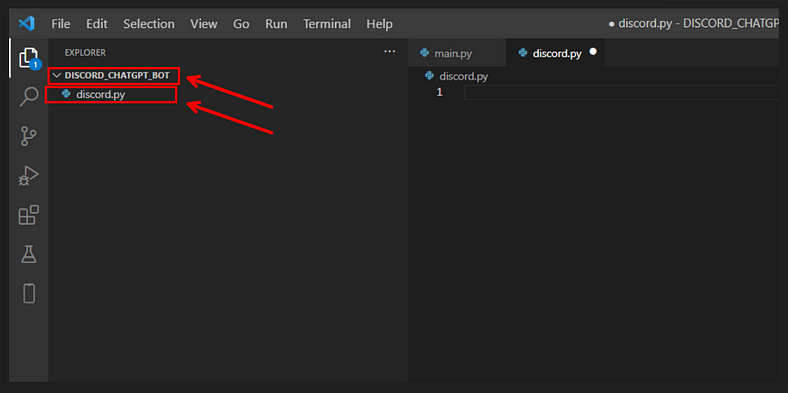
5. Create files and folders in Visual Studio Code
In the left pane, click the Folder Icon
6. Create a venv
From the root directory, copy and paste the following commands into the terminal
py -m venv env scripts/activate 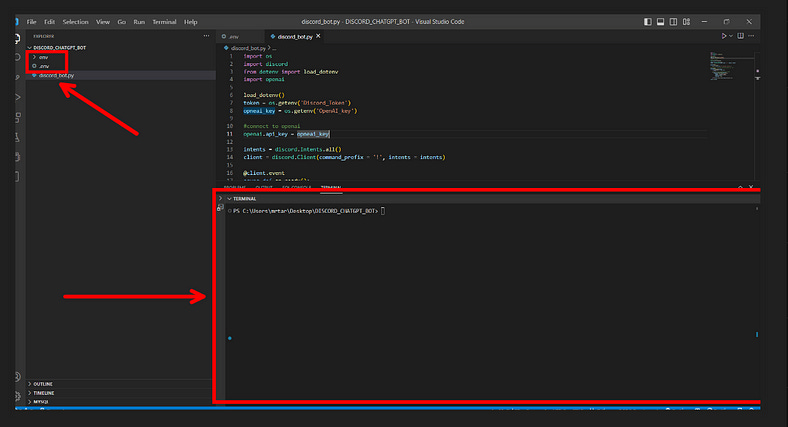
You should see (venv) in the terminal now.
7. Use Command Prompt
Copy and paste the following Commands
py -m pip install -U discord.py pip install openai pip install python-dotenv 
Create folder name Discord_ChatGPT_Bot
Create a file name discord.py
Create another file called .venvto the store Discord API and Openai
8. Write code in the .env file
Go to the
.envfile

2. Type the following command and mention the token that you copied from the Discord Developers
Discord_Token =
OpenAI_key =
9. Get OPENAI Key
Go to the OpenAI website.
Log in and click on Personal.
Click View API

4. Now click “Create new secret key”.
5. Keep this somewhere safe! We’ll add it to the code later.
10. Check the model
Navigate to Documentation

2. Now under Get Started, click Models, then select GPT-4 for maximum performance (note at the time of writing this cost roughly 30x the price of the GPT 3.5 Turbo model for the same number of tokens)
3. Copy the name of the latest model from the right pane.
Note: GPT-4 requires a credit card to use.
11. Write code in the Discord.py file
Go to the
Discord.pyfileCopy and paste the following script:
import os
import discord
from dotenv import load_dotenv
import openai

load_dotenv()
token = os.getenv('Discord_Token')
opneai_key = os.getenv('OpenAI_key')

#connect to openai
openai.api_key = opneai_key

intents = discord.Intents.all()
client = discord.Client(command_prefix = '!', intents = intents)

@client.event
async def on_ready():
    print(f'{client.user} has connected to Discord!')

#test sending a message and receiving a message from a bot
@client.event
async def on_message(message):
    if message.author == client.user:
        return
    #check if the bot is mentioned in the message
    if client.user.mentioned_in(message):
        response = openai.Completion.create(
            engine = 'gpt-4',
            prompt = f'{message.content}',
            temperature = 0.5 ,
            max_tokens = 2048,
        )
    await message.channel.send(response.choices[0].text)

client.run(token)
12. Run the script!
Write the following script in the terminal and run
python discord.py13. Chat with ChatBot
Go to your channel

You can see ChatBot is online.
Type a question or start a conversation.
14. Why We Need To Use Replit
If we want to use the program from any other device while we’re out and about, we might not get a response because our connection to the “server” will be cut off when we exit the program on our computer and you won’t be able to actually call your Bot through your local environment. So we will use Replit to make our Bot Alive even if we are offline!
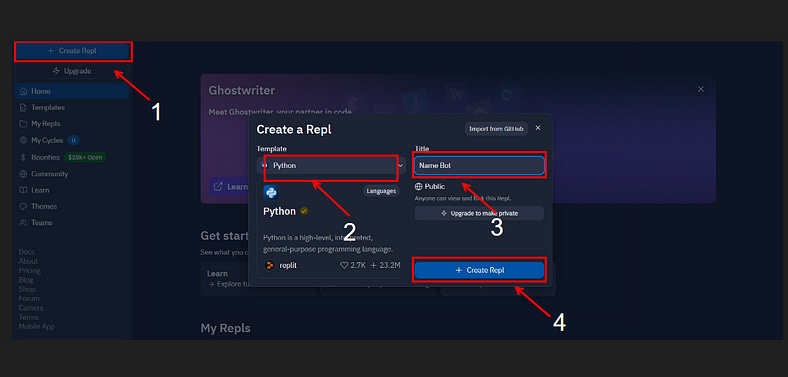
15. Creating a Repl and installing our Discord
Create a new Repl
Select Python
Type your name Bot and Create Repl
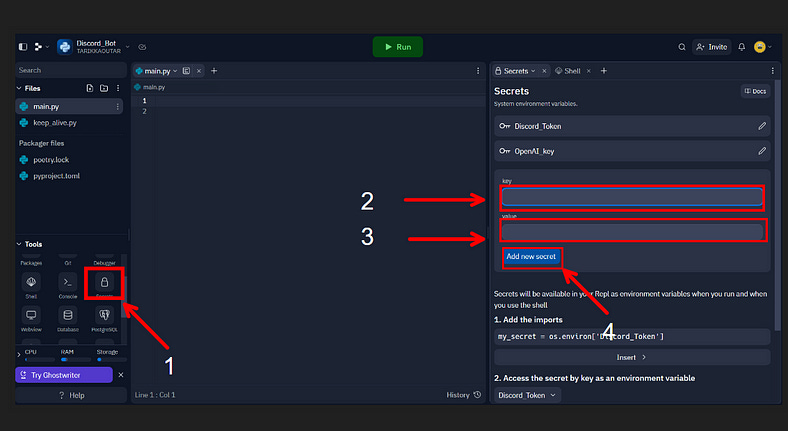
16. Setting up authorization for our bot
Scroll down, go to the Secrets button and click
Type Discord_Token in the Key
Copy the API Key from your IDE and paste it into Value
Click Add New Server
17. Create a Keep alive file
Create a new file and name it
keep-alive.py
2. Copy and paste the following script as pictured below. The source code is below 👇.

from flask import Flask
from threading import Thread

app = Flask('')


@app.route('/')
def home():
  return "I'm alive"


def run():
  app.run(host='0.0.0.0', port=8080)


def keep_alive():
  t = Thread(target=run)
  t.start()
3. In Repl, save the change
18. Write A Code In The Main.py File
Go to the
main.pyfile
2. Copy and paste the following script:
import os
import discord
import openai
from keep_alive import keep_alive

token = os.getenv('Discord_Token')
opneai_key = os.getenv('OpenAI_key')

#connect to openai
openai.api_key = opneai_key

intents = discord.Intents.all()
client = discord.Client(command_prefix='!', intents=intents)


@client.event
async def on_ready():
  print(f'{client.user} has connected to Discord!')


#test sending a message and receiving a message from a bot
@client.event
async def on_message(message):
  if message.author == client.user:
    return
  #check if the bot is mentioned in the message
  if client.user.mentioned_in(message):
    response = openai.Completion.create(
      engine='text-davinci-003',
      prompt=f'{message.content}',
      temperature=0.5,
      max_tokens=2048,
    )
  await message.channel.send(response.choices[0].text)


keep_alive()

client.run(token)
3. Save the change
19. Write code in main.py
Click on Run Button and Here to Go

20. Chat with the ChatBot
Go to your channel
Type a question or start a conversation.

=======================
Feel free to check out my other article on How to Use ChatGPT 4 Right Now
If you enjoyed reading this article, follow my personal blog to stay ahead of the AI game! Don’t miss out on this opportunity to expand your knowledge and grow your skills.
Enjoyed the article? Feel free to leave a tip! Thank you for your support!